1998 Honda Accord Headlight Bulb Locations Diagram
Honda Accord Headlight Bulbs Replacement Guide
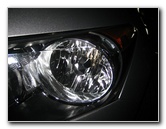
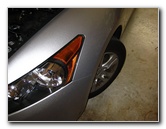
Pictures illustrated instructions for how to replace the light bulbs in a 2008 to 2010 Honda Accord sedan headlight assembly.
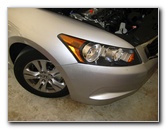
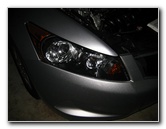
2009 Honda Accord LX
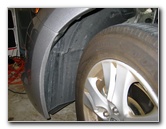
Wheel Turned To Left
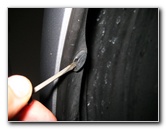
Small Flathead Screwdriver
Owners of other eighth generation Honda Accord coupe or sedan vehicles from 2008, 2009, 2010, 2011 & 2012 should also find the guide to be useful.
Other Honda vehicles such as the Civic, Element, Insight, Pilot, Fit, CR-V, Ridgeline, and Odyssey may have similar headlight bulb replacement procedures.
The headlight assembly of a 2008-2010 Honda Accord contains four light bulbs with the following replacement part #'s from Sylvania and other manufacturers: Low Beam Headlight # 9006, High Beam # 9005, Front Turn Signal / Parking Light # 7528, and Front Side Marker # 168.
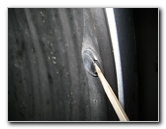
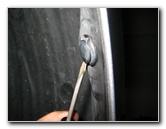
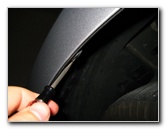
Remove 1st Plastic Rivet
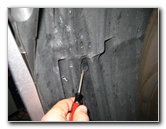
Prying Up Top of Pop Rivet
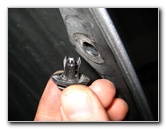
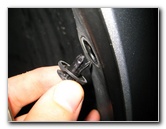
Remove 2nd Pop Rivet
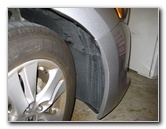
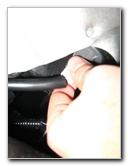
You'll need a small flat head screwdriver to remove three black plastic pop rivets from the fender well in front of the passenger side tire.
Two Border Rivets Removed
Remove 3rd Retaining Clip

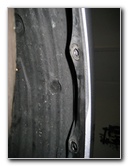
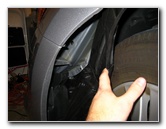
Pull Back Fenderwell Cover
Removing the third one located a few inches closer to the center line of the car makes pulling back the fender well cover a lot easier.
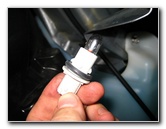
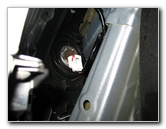
Once you pull back the fender well cover, you will be able to see the low beam headlight bulb power connector and socket base.
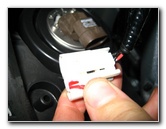
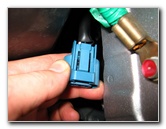
Then remove the power connector by pressing on the plastic tab at the bottom of the connector near the wires.
Try wiggling if it won't come off easily.
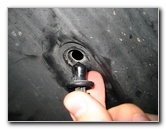
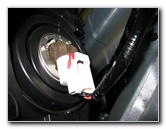
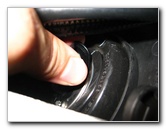
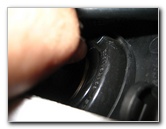
Then turn the socket 1/4 turn counter clockwise and pull it straight out from the headlight assembly.
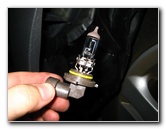
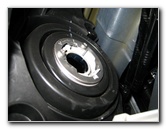
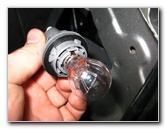
Replace the old # 9006 low beam bulb with a new one, turn it 1/4 turn clockwise to secure it in the assembly, and pop the power connector back into place. Test the new bulb before replacing the fender well cover and pop rivets.
1/4 Turn Counter Clockwise
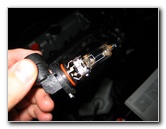
# 9006 Low Beam Bulb
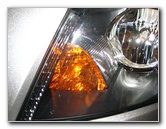
2. Passenger Sidemarker
Remove the socket by turning it 1/4 turn counter clockwise.
I had to use a pair of needle nose pliers to help turn the socket.
Pull the # 168 passenger side front side marker light bulb straight out from the socket and replace it with a new one. Test the bulb before replacing the fender well and pop rivets.
Sidemarker Power Connector
# 168 Front Sidemarker
3. Driver Low Beam
Driver Side Headlight
Driver Side Fender Well Cover
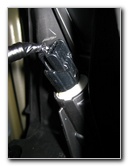
Remove Black Pop Rivet
2nd Pop Rivet
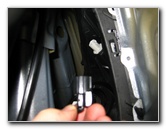
3rd Inner Pop Rivet
Pull Back Fender Well Cover
Once the three black plastic pop rivets are removed, pull back the fender well cover and locate the low beam headlight bulb socket.
(The driver side side marker light bulb socket is just above and to the left of the low beam headlight bulb socket.)
Driver Side Low Beam
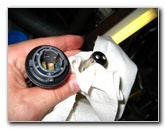
Low Beam Headlight Socket
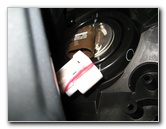
Headlight Bulb Connector
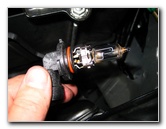
Then turn the bulb's base 1/4 turn counter-clockwise and pull it straight out from the socket.
Be sure to not touch the glass bulb on the new bulb. If you do touch the bulb, clean it with a paper towel and some rubbing alcohol.
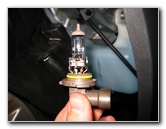
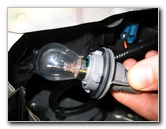
# 9006 Low Beam Bulb
Driver Low Beam Socket
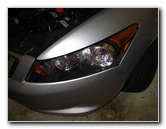
Passenger Side Headlight
Test out the new driver side low beam headlight bulb before putting back the fender well and re-inserting the three black plastic pop rivets.
Passenger Signal & High Beam
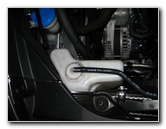
Engine Coolant Reserve Tank
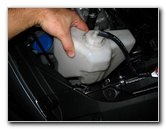
Pull Tank Off Stay
Coolant Tank Removed
Signal & High Beam
Turn Signal / Parking Bulb Base

1/4 Turn Counter Clockwise
# 7528 Turn Signal Bulb
Push Down & Twist 1/4 Turn
To remove the # 7528 turn signal / parking light bulb from the socket, push down on the bulb and twist it 1/4 turn counter clockwise until it can be easily lifted out of the socket.
Replace it with a new # 7528 light bulb and test it by turning on the vehicle's hazard lights. If it doesn't flash as it should, try removing it and re-seating it back into the socket.
High Beam Headlight Base
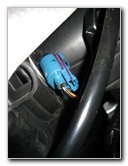
Press Tab & Remove Connector

High Beam Connector Removed
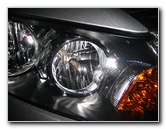
5. Passenger Side High Beam Headlight Bulb - The passenger side high beam headlight bulb is located next to the passenger side turn signal / parking light bulb further towards the outside of the vehicle.
The engine coolant reserve tank will need to be lifted up from it's "stay" (no tools required) and moved to the side for easier access.
1/4 Turn Counter Clockwise
Pull High Beam Straight Out
Push on the the tab located near the bottom of the high beam headlight bulb power connector and wiggle off the connector from the bulb's base.
Then turn the bulb's base 1/4 turn counter clockwise and pull the high beam bulb straight out from the headlight assembly.
Replace it with a new # 9005 high beam headlight bulb and test it by turning on the high beams.
Driver Side Headlight
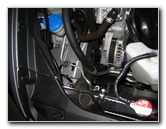
Driver Side Signal & High Beam
1/4 Turn Counter Clockwise
It is located just in front of the driver side edge of the car's battery.
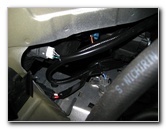
Just look first with a flashlight to orientate yourself and then reach in to grasp the turn signal bulb's grey plastic base.
Turn it 1/4 turn counter clockwise and pull it straight out from the headlight assembly.
To remove the old # 7528 turn signal bulb from the socket, press down on the bulb and turn it 1/4 turn counter clockwise until it can be easily lifted from the socket.
# 7528 Turn Signal / Parking

Push Down & 1/4 Turn CC
Driver Side High Beam Headlight
Removing the car's battery helps make the job a lot easier, but is not necessary.
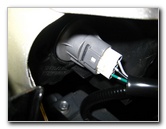
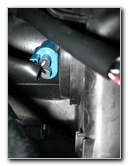
Locate the light blue power connector on the high beam headlight bulb's base situated just to the right of the turn signal bulb.
Then push on the power connector's retaining tab at the bottom of the connector near the wires and wiggle it until it comes free from the high beam bulb's base.
Then turn the high beam bulb's base 1/4 turn counter clockwise and pull it straight out from the headlight assembly.
Replace it with a new # 9005 high beam bulb and be sure to not touch the glass part of the bulb with your bare fingers.
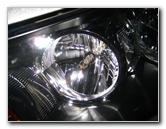
Test the new bulb by turning on the vehicle's high beams.
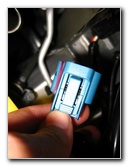
Press Tab & Remove Power
High Beam Power Removed
1/4 Turn CC & Remove
For more, check out my other 2008-2012 Honda Accord Repair & Maintenance Guides.
Posted by: arnulfonapolitanoss.blogspot.com
Source: https://paulstravelpictures.com/Honda-Accord-Headlight-Bulbs-Replacement-Guide/
Komentar
Posting Komentar